I have watched my grandmother and mother can, helped my mother and cousin can pears a couple of years ago, watched Anais and Jordanne Dervaes give canning workshops to junior high and high school students, but I had never canned a batch of something all by myself.
So, I had some tomatoes that needed dealing with (not grown by me, however) and thought it was a good opportunity to go through the steps of actually canning...by myself...so I would know what it takes. There is NOTHING like direct, hands-on, fully responsible experience for learning.
I started by cleaning my kitchen, reading the instructions and recipe and going to the store to buy a few ingredients I didn’t have on hand.
Next, I collected the various pieces of equipment I needed. Because this was the first time, it took a while and seemed like a lot.
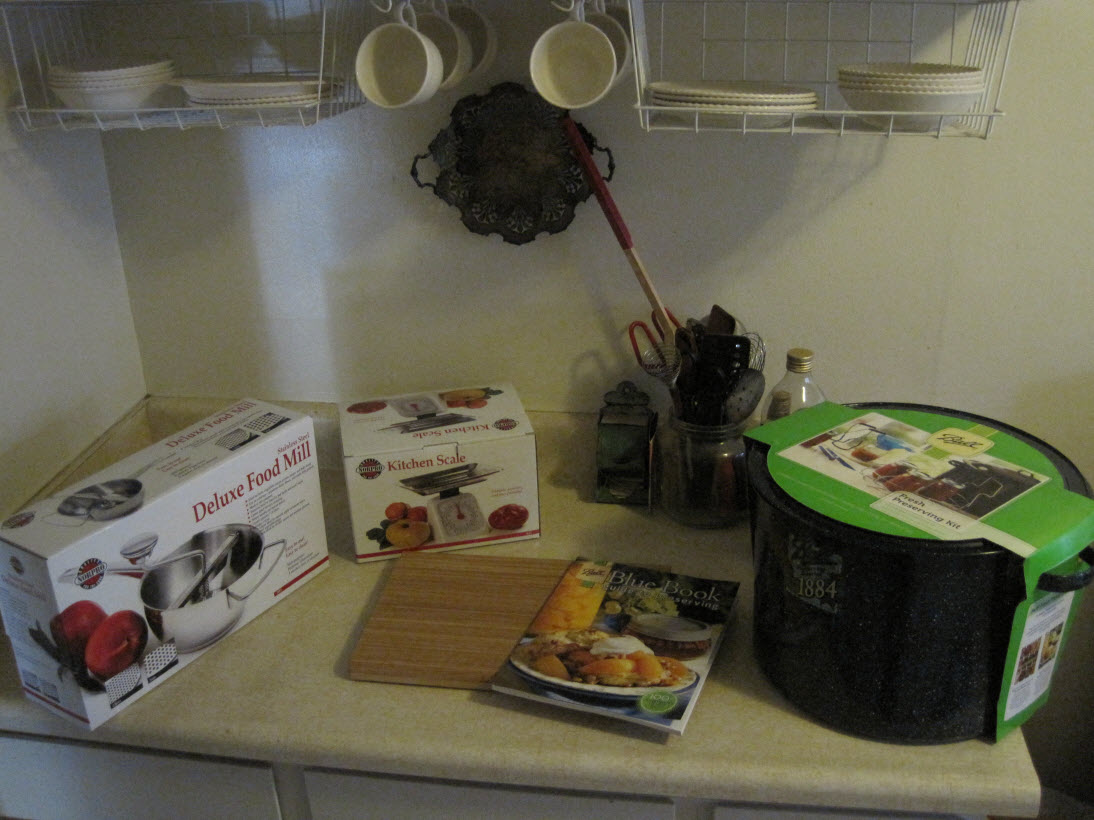
From left to right (all available at Urban Homestead Supply):
Food Mill
Food Scale
Bamboo Cutting Board
Canning Kit, including recipe book and utensil set.

After gathering the equipment and sharpening the knives, I began sorting and weighing the tomatoes.

First lesson experience teaches: estimating poundage of produce. The recipe called for 45 pounds of tomatoes. I thought for sure I had that much—NOT. I barely made it over 15 pounds by adding some heirloom tomatoes in addition to the yellow tomatoes. I did know that non-paste tomatoes are not the best choice for canning—they are too watery—and, oh my, did that prove true! But, I was dealing with the produce I had on hand, that would go to waste if it was not processed.
Then I started washing the tomatoes. This colander was really handy!


My kitchen is quite small, so it worked well to pivot between the sink and opposite counter to wash and cut up the tomatoes.

I had used over15 pounds knowing that some weight would be reduced because of the trimmings. I had about 2 pounds of cut out bits. (Question: If the recipe calls for 15 pounds, is that before or after the produce is processed?)


Second lesson: 15 pounds is PLENTY unless you have more people to help prepare the produce (or tons of time) and a HUGE pot (or more than one smaller pot) to cook down the tomatoes.
I consulted my Gourmet cookbook for the correct way to cut an onion, figuring this was a good time to practice. But I had forgotten how strongly onions affect my eyes now that I no longer wear contacts! So, I hurriedly lit a candle to try mitigate the fumes.

Then the cooking started...and the main lesson of the day: THINGS ALWAYS TAKE MORE TIME THAN I THINK THEY WILL!! Especially the cooking down of (very liquidy) tomatoes.


The recipe called for straining the tomatoes after cooking for 20 minutes.

I tried a couple ladle-fulls but decided to skip that step this time—I needed all the bulk I could get! (But the food mill will be handy for plenty of other recipes.)

I started sautéing the onions and garlic around 3:30 p.m. And, FIVE HOURS LATER, finished cooking down the tomatoes (although still rather watery) at 8:30 p.m.!!

Meanwhile, I had prepped the jars and lids.


I didn't quite understand how the rack was supposed to be used by just reading the description. However, afterwards, I saw the picture and understood the rack is supposed to be set on the rim of the canner while you load the jars. Next time....

Filling up the pint jar after having added one tablespoon of lemon juice.

Ready to go into the water bath canner.

Ready to be boiled for 35 minutes.

All done! The lids "popped" almost immediately after the jars came out of the canner. When they cooled, I also took off the bands to double-check the seal of the lids. Requisite shots of canned goods ready to be stored for winter.


Final lesson learned: Use a good camera. I was too tied up with all the steps involved that I just grabbed the easy-to-handle small camera. But I don't think the flash was powerful enough. Next time....


